
How to Care for Delivered Plants After Shipping
Get practical tips on how to care for delivered plants after shipping, from first inspection to watering, acclimating, and supporting healthy growth.
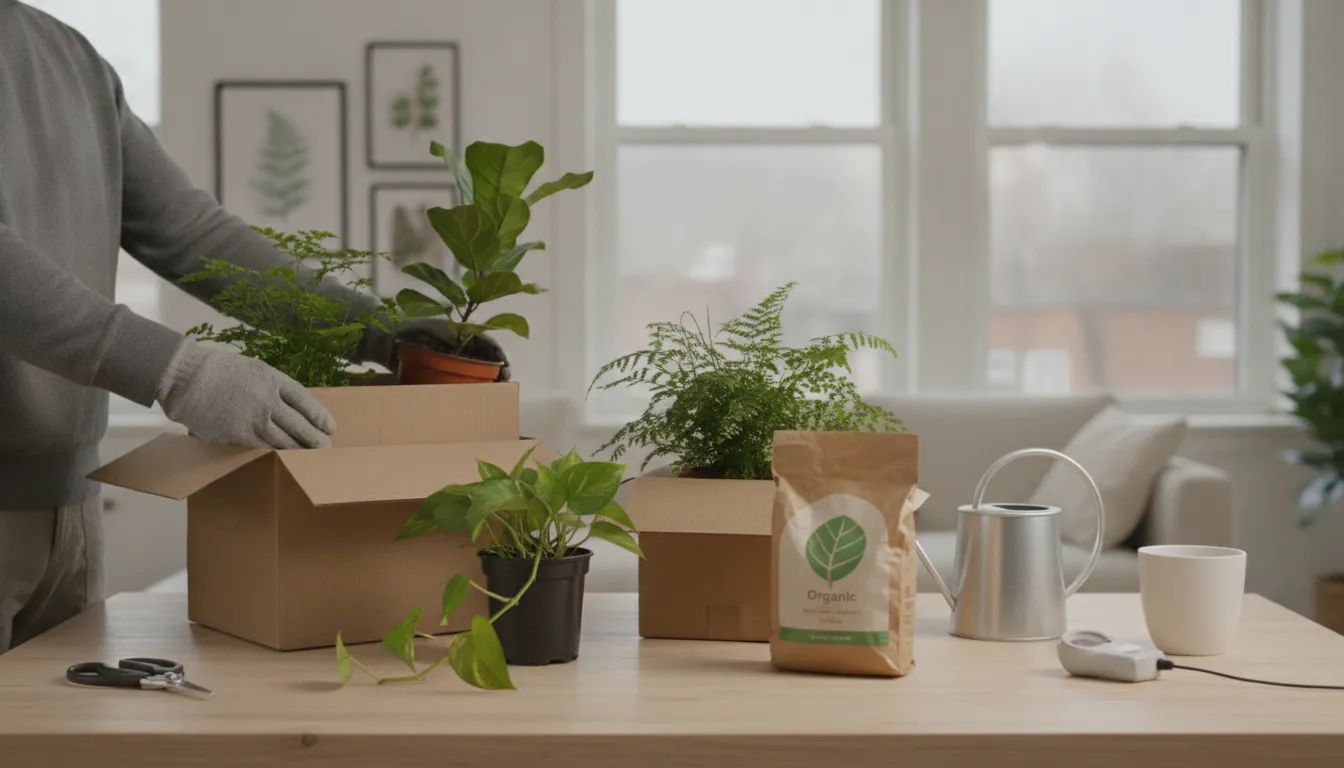
A new plant brings plenty of excitement, but it may need a little patience after delivery. Time in a box can leave foliage flattened, soil uneven, and flowers less perky than they looked in the listing photo. Before you water, prune, or move it into bright sunlight, give the plant a careful inspection. Small steps can prevent additional stress and help you spot damage early. We’ll show you how to care for delivered plants with practical advice for the first day, first week, and first month. You’ll learn where to place your plant, how to check its moisture, and which warning signs deserve a call to your local florist.
Key Takeaways
- Inspect the delivery carefully: Photograph the box and plant, remove the packaging gently, and check the leaves, stems, pot, soil, and drainage before watering.
- Allow time to adjust: Keep the plant in bright, indirect light away from drafts, heaters, and direct sun. Let it rest for 24 to 48 hours before repotting, pruning, or fertilizing.
- Contact the florist about serious concerns: Save the packaging and order details, then send clear photos if you notice severe damage, pests, mushy roots, poor drainage, or continued decline.
What Should I Do When My Delivered Plant Arrives?
A delivered plant may look a little different after spending time in a box. Leaves can shift, soil may settle, and stems can droop slightly during transport. These changes do not always indicate a serious problem. Start with a calm inspection, then give the plant time to adjust before repotting, pruning, fertilizing, or placing it in strong sunlight.
Your first steps help prevent additional stress. Bring the package indoors, document its condition, unpack it carefully, and check the soil before adding water. If the plant, pot, or packaging arrived damaged, clear photos and order details will help the florist understand the issue and recommend the right solution.
Keep the plant in a stable location while you inspect it. Avoid placing it beside a heater, air conditioner, open window, or bright, hot glass. Once the plant is unpacked, focus on the basics: support the container, protect the foliage, confirm that excess water can drain, and allow the plant to rest. This gentle approach works whether you ordered a leafy houseplant, flowering plant, or gift arrangement for delivery in Salt Lake City, Portland, or the Seattle-Tacoma area.
Move the plant indoors or to a stable spot
Bring the package indoors as soon as it arrives. Do not leave it on a porch, in a car, or in direct sunlight while you run errands or wait to open it. Heat, cold, wind, and rain can affect a plant that has already spent time in transit.
Choose an indoor location with a steady temperature and bright, indirect light. A table or counter away from busy walkways makes a good temporary spot. Keep the plant clear of heating vents, air conditioners, open windows, and cold glass. If the package feels especially hot or cold, let it sit indoors briefly before opening so the temperature can change gradually. Avoid leaving the plant sealed for an extended period, since it still needs fresh air and a timely inspection.
Photograph the package and plant before unboxing
Before opening the package, take clear photos of each side of the box. Capture crushed corners, torn cardboard, moisture, missing labels, or other visible damage. Even if the box appears intact, photographing it creates a useful record of the delivery’s condition.
As you unpack the plant, photograph broken stems, damaged leaves, spilled soil, cracked pots, or loose containers. Keep these photos with your order confirmation and delivery details. If you need assistance, the images give the florist a clearer idea of what happened during transport. Canopy Plant Co. recommends photographing serious damage, the box, and the packaging in its plant delivery guide. Keep the packaging until you know whether the plant needs to be reviewed, replaced, or returned.
Open the box and remove the wrapping carefully
Open the box on a clear, stable surface where loose soil and packing materials are easy to manage. Use scissors to cut tape and cardboard instead of pushing a knife deep into the package. Check for handling labels and follow any instructions that show which side should remain upright.
Remove paper, plastic, foam, and other wrapping slowly. Do not pull on leaves, flowers, or stems. If the packaging is tight, cut or loosen it in small sections until the container is free. Take extra care around delicate blooms and new growth. If soil has shifted, leave it alone until the plant is fully removed. A slow, careful unboxing helps prevent minor movement during shipping from causing additional breaks or tears.
Support the stems, leaves, and root ball
Lift the plant by its pot or container, not by its foliage. Place one hand beneath the pot and use the other to steady the outer stems or leaves without squeezing them. If the container has shifted inside the box, support the base before moving it so the root ball does not slide or tip.
Do not pull on exposed roots or shake soil from the root ball. Loose soil can remain where it is until you have completed the initial inspection. Set the plant upright and remove only the packing material that is easy to reach. If a stem is bent, avoid forcing it back into place immediately. The plant may recover with time, and extra handling can cause more damage. These careful handling practices also appear in Canopy Plant Co.’s plant arrival instructions.
Check the pot, saucer, container, and drainage
Once the plant is upright, inspect the pot for cracks, dents, loose pieces, or a shifted nursery container. Check that the saucer sits flat and that a decorative basket or outer pot is not trapping water around the plant’s inner container. If the plant arrived wrapped, remove the wrap before watering so excess moisture has somewhere to go.
Look underneath the pot for drainage holes, and make sure soil or packing material has not blocked them. Examine the soil without pressing it down or disturbing the roots. It may feel loose or uneven after delivery, but that alone does not mean the plant needs repotting. Do not water automatically. Check the soil and foliage first, then decide whether moisture is necessary. Canopy Plant Co.’s care guidance also recommends checking the plant’s condition and drainage before watering.
Let the plant rest for 24–48 hours
Give the plant 24 to 48 hours to settle in a protected location with bright, indirect light. Keep the temperature steady, and avoid strong sun, drafts, open windows, and heating or cooling vents. This short adjustment period gives the plant time to respond to its new surroundings and gives you a clearer view of its condition.
During the first day or two, check for worsening drooping, broken growth, dry soil, or standing water. Avoid repotting, fertilizing, or making several care changes at once unless the plant has an immediate drainage or safety problem. Plants By Mail recommends letting newly delivered plants rest in bright shade or a protected spot for 24 to 48 hours. After this rest period, you can assess the leaves, soil, and overall condition more accurately.
How Can I Assess My Delivered Plant?
A delivered plant may look slightly different from its listing photo when it arrives. Travel can compress leaves, shift soil, bend stems, and leave the plant looking tired. Before you water, prune, or repot it, give it a gentle inspection. This will help you distinguish temporary shipping stress from damage that needs attention.
Take your time and handle the plant by its container rather than its foliage. If you ordered a plant for delivery in the Salt Lake City, Portland, or Seattle-Tacoma area, clear photos can also help your florist understand the plant’s condition and recommend the right care.
Inspect the leaves, flowers, stems, and base
Begin at the top of the plant and work downward. Look for folded, flattened, bruised, or bent leaves, along with drooping flowers or damaged petals. One or two yellow or bruised leaves are usually not a concern after delivery. Green leaves with creases or tears can still help the plant recover, so leave them attached unless they are clearly broken or mushy.
Next, check the stems for cracks, severe bends, soft spots, or discoloration. At the base, make sure the plant is sitting securely in its pot and has not pulled away from the soil. A slight lean or tired appearance during the first day or two can be normal. Plants may need 24 to 72 hours to recover from shipping, especially after spending time in a dark box.
Check the soil 1–2 inches below the surface
Do not decide whether to water by looking only at the top layer of soil. Press a clean finger about 1 to 2 inches into the potting mix, or use a moisture meter if the container is deep. Soil can shift during delivery, but compacted or uneven soil does not always mean the plant needs water.
If the soil feels dry at that depth, water slowly until excess water drains from the pot. If the soil feels moist, wait and check again later. Constantly soggy soil leaves roots with too little oxygen and can contribute to root problems. Plant arrival care guidance also recommends checking below the surface before watering.
Look for damage, pests, webbing, and disease
Inspect both sides of the leaves, the stems, and the soil surface. Look for dark or spreading spots, fuzzy growth, sticky residue, tiny insects, or fine webbing. A few marks may come from handling during delivery, but pests and disease can spread if they go unnoticed.
Pay special attention to leaf undersides and the areas where leaves meet stems. These sheltered spots can hide insects. Check the pot rim and soil as well. If you notice a serious concern, keep the plant away from your other houseplants until you can speak with the florist or a plant professional. Take photos before cleaning or treating the plant, as recommended in this plant arrival guide.
Inspect exposed roots without disturbing the plant
If roots are visible above the soil or through a drainage hole, inspect them without pulling the plant from its container. Watch for roots that look soft, slimy, very dark, or damaged, especially if the plant also has a sour odor or widespread wilting.
Lift the plant by holding the pot, never by the leaves or stems. Do not shake off the soil, loosen the root ball, or repot simply to get a closer look. Extra handling can add stress while the plant is settling in. If the root ball is loose, the plant is sitting at an unusual angle, or roots are exposed after transit, support it gently and contact the florist for guidance.
Separate shipping stress from serious damage
Mild drooping, settled soil, a slight lean, bent leaves, and one or two yellow leaves commonly appear after travel. These signs often improve within one to three weeks when the plant receives steady care. Give it suitable light, appropriate moisture, and stable temperatures, and avoid making several changes at once.
More serious warning signs include widespread collapse, mushy roots, a foul odor, blackened stems, extensive leaf damage, or heavy pest activity. A plant that continues to decline after several days of consistent care also deserves attention. Keep the care card and follow the florist’s instructions before pruning, fertilizing, or treating the plant. The plant delivery guidance from Canopy Plant Co. offers additional help with common shipping stress.
Photograph problems and save the packaging
Take clear photos of the entire plant, then capture close-ups of damaged leaves, stems, flowers, soil, the container, and any exposed roots. Photograph the delivery box as well, including shipping labels, crushed corners, punctures, torn wrapping, and other signs of handling during transit.
Save the box and packing materials until the florist confirms that they are no longer needed. When reporting a problem, include your order number, delivery date, plant name if known, and a brief description of what you found. Explain where the plant is sitting and whether you have watered it. Detailed photos and information help the florist decide whether the plant needs observation, a care adjustment, replacement, or another solution.
How Do I Acclimate a Delivered Plant?
A delivered plant may need time to recover from being boxed, transported, and placed in a new home. Mild drooping, a few fallen leaves, or slight movement in the soil does not always indicate a serious problem. Give the plant a calm space, check its condition, and make care changes gradually.
During the first week, focus on steady light, comfortable temperatures, and careful watering. The best routine depends on the plant variety, pot, soil, root condition, and season. If your delivery includes a care card, use those instructions as your starting point.
Start with bright, indirect light
Place the plant near a bright window where it receives plenty of filtered light, but keep it away from intense direct sun at first. A sheer curtain can soften strong rays, especially near south- or west-facing windows. Bright, indirect light gives the plant energy without exposing recovering leaves to excess heat.
Avoid moving a plant from a dark shipping box directly into harsh sunlight. Sudden exposure can cause scorched or bleached patches. If your home has limited natural light, use a grow light according to the manufacturer’s directions. The Royal Horticultural Society’s houseplant guidance offers helpful information about light and indoor plant placement.
For now, skip fertilizer and repotting unless you discover a serious drainage or root problem. Let the plant settle before making major changes.
Avoid drafts, vents, cold windows, and temperature shifts
Keep your delivered plant away from heating vents, air-conditioning vents, fans, exterior doors, and drafty windows. These areas can create quick changes in temperature and humidity, which may lead to wilting, browning, or leaf drop. A stable room is usually better than a spot that has ideal light for only part of the day.
If the plant arrives cold, let it warm gradually to room temperature before watering or placing it in direct sun. Do not set it beside a heater to warm it faster. Sudden heat can dry the leaves and soil unevenly.
Choose a temporary location with steady temperatures and moderate light. After the plant looks rested and its leaves feel firmer, you can begin moving it toward its permanent home.
Isolate new plants while checking for pests
If you already have houseplants, keep the delivered plant separate for about two weeks while you inspect it. Another room is best, but even a little distance from your existing collection can help. This gives you time to notice pests before they spread to nearby plants.
Check the undersides of leaves, stems, soil, and the area around the pot. Look for fine webbing, sticky residue, tiny insects, cottony spots, or clusters of eggs. A flashlight can help you inspect folds in thick leaves. You do not need to disturb the root ball during this first check.
If you find something concerning, take clear photos and contact the florist before applying a treatment. The University of Minnesota Extension pest guide can help you compare common signs and identify possible next steps.
Increase direct light over one to two weeks
Once the plant appears stable, increase its light exposure slowly. Move it a little closer to the window, then observe it for several days. If the leaves remain firm and show no signs of scorching, make another small adjustment. Many plants can reach their permanent location over one to two weeks.
Watch for signs that the transition is happening too quickly. Bleached patches, crispy brown edges, or sudden curling may indicate excess light or heat. Stretched stems, pale new growth, and leaves turning toward the window may mean the plant needs more light.
Light preferences vary by plant. A tropical foliage plant may prefer bright filtered light, while a low-light variety may do better farther from the glass. Follow the care instructions included with your delivery, and adjust the plant in small steps.
Maintain humidity without soaking the soil
Slightly higher humidity can help some delivered plants, especially tropical varieties with thin leaves. A cool-mist humidifier is often the most dependable option. You can also group plants together, provided there is enough space for air to circulate freely.
A humidity tray may help when the pot sits above the water on pebbles. The container should never rest directly in standing water. Avoid sealing the plant in a plastic bag or creating a damp, stagnant space, since excess moisture can encourage rot and disease.
Humidity does not replace watering. Check the soil before adding water, since the plant may still have moisture around its roots from the delivery. Keep the leaves dry if the plant is prone to fungal problems, and follow the Canopy Plant Co. guidance for plants received by mail.
Adjust care for heat, low light, and seasonal changes
Your plant may need different care depending on its location. Warm rooms and bright light can dry soil faster, while low light and cooler temperatures often slow water use. Avoid watering on a fixed schedule during the adjustment period. Check the soil and observe the leaves and stems instead.
Heat from a sunny window can increase moisture loss, while winter conditions may bring colder glass and drier indoor air. Move the plant farther from the window if the leaves feel hot or begin to brown. If growth slows in low light, the plant may need less water rather than the same amount on a regular schedule.
The plant’s variety, pot size, soil, root condition, and moisture level all affect its needs. Signs of thirst should guide your decisions more than a set number of days. Keep notes during the first few weeks so you can see which changes help the plant settle.
How Should I Water a Delivered Plant?
A delivered plant may arrive slightly thirsty, but watering it right away is not always the best first step. Shipping conditions, the plant variety, the pot size, and the soil’s moisture level all affect what it needs. Before picking up the watering can, inspect the plant and check the soil below the surface.
The goal is evenly moist soil, not soil that stays constantly wet. Too little water can leave leaves limp and stressed, while excess water can reduce airflow around the roots and cause root problems. These plant care guidelines recommend using soil moisture as your guide instead of following a strict watering schedule.
Check the soil before watering
Press a clean finger about 1 to 2 inches into the soil, or use a wooden skewer if the pot is small. The surface may look dry while the soil around the roots is still damp, so checking below the top layer gives you a more accurate reading.
If the soil feels dry at that depth, the plant may need water. If it feels cool and moist, wait and check again later. You can also lift the pot if it is small enough to handle safely. A noticeably light container often indicates dry soil, while a heavier pot may still contain plenty of moisture. Check the florist’s care card too, since watering needs vary by plant type.
Water dry soil until excess drains
If the soil is dry, pour room-temperature water slowly over the surface. Move around the pot so water reaches the root ball evenly instead of flowing down just one side. Continue watering until a small amount begins to drain through the holes at the bottom.
Let the pot drain completely before placing it inside a decorative container or back on its saucer. Water flowing from the drainage holes shows that moisture has moved through the soil, rather than only wetting the top layer. Canopy Plant Co. shares watering advice for delivered plants, including plants with drooping or slightly shriveled leaves.
Water damaged roots gently
If the plant arrives with exposed, broken, or badly damaged roots, avoid soaking the entire root ball. Injured roots may not absorb water normally, and excess moisture can remain around damaged tissue. Instead, lightly dampen the soil near the roots and let the plant rest in a stable location.
Use a small amount of water at a time, then check the soil again later. Do not force loose roots into place or pack wet soil tightly around them. If the roots look severely broken, mushy, or dark, take clear photographs and contact the florist before making major changes. The plant may need specific recovery instructions rather than a normal watering routine.
Rehydrate very dry plants without soaking them
A plant with very dry soil and firm leaves usually needs a thorough watering, but it does not always need to sit in water for hours. Water slowly from the top until excess flows from the drainage holes, then let the container empty fully.
If the soil has pulled away from the sides of the pot and water runs straight through, wait a few minutes and water lightly again. This gives the dry mix time to absorb moisture. Avoid repeated heavy watering if the roots are damaged or the container drains poorly. Canopy Plant Co. recommends thorough watering followed by complete drainage when the soil is dry but the leaves remain firm.
Wait if the soil feels moist
Do not water simply because the plant has traveled in a box. If the soil feels moist 1 to 2 inches below the surface, give the roots time to use that moisture. Wet soil combined with low light, cool temperatures, or limited airflow can remain saturated for too long.
Place the plant in its recommended light and check the soil again after a few days. Yellowing leaves, a sour smell, or soil that stays wet may point to a drainage issue rather than a need for more water. Waiting can feel counterintuitive when a plant looks tired after delivery, but extra water will not correct ordinary shipping stress when the root ball is already damp.
Use room-temperature water and empty the saucer
Use room-temperature water whenever possible. Very cold or hot water can add unnecessary stress. Pour slowly onto the soil and avoid leaving water pooled in the center of the plant or on fuzzy leaves. After watering, allow the pot to drain for several minutes.
Empty the saucer or decorative container once excess water collects. A plant should not sit in standing water, since saturated soil can limit airflow around the roots. If the plant arrived in a nursery pot inside a cover pot, remove the inner pot for watering when possible. This makes drainage easier to check and prevents water from collecting where you cannot see it.
Match watering to the plant, pot, light, and season
There is no universal watering schedule for every delivered plant. Succulents and cacti generally prefer the soil to dry more fully between waterings, while tropical foliage plants may need more consistent moisture. A small pot can dry faster than a large one, and a plant in bright light may use water more quickly than one in a dim room.
Check the soil instead of watering on the same weekday every week. Indoor heating, air conditioning, humidity, rainfall, and seasonal light can change how quickly soil dries. Follow the care instructions provided by your florist, then adjust based on what you observe. Plants By Mail recommends responding to soil moisture and weather conditions instead of relying on a strict calendar.
When Should I Plant or Repot a Delivered Plant?
A delivered plant usually needs time to settle before you change its container or location. Shipping can jostle the roots, shift the soil, and expose the plant to unfamiliar temperatures and light. Whether your plant arrived in Salt Lake City, Portland, Seattle-Tacoma, or another nearby area, start with a stable location and follow the care instructions included with your delivery.
For most plants, wait until it shows signs of recovery before repotting or planting it outdoors. Check the soil before watering, keep the temperature steady, and watch for firm stems, stable leaves, and new growth. These signs suggest the plant is adjusting well.
Let the plant recover before repotting
Wait about 30 days before repotting a healthy delivered plant. This gives the roots time to recover from handling and lets you see whether drooping or a few fallen leaves are temporary shipping stress. Repotting too soon adds more root disturbance and changes how quickly the soil dries.
During this period, focus on consistent care rather than changing several things at once. Place the plant in suitable light, check the soil before watering, and avoid moving it repeatedly. The Canopy Plant Co. plant care guide also recommends waiting before repotting unless the container or roots have a serious problem.
Keep the nursery pot inside a decorative container
You do not need to repot a plant simply because its nursery pot does not suit your space. Instead, place the nursery pot inside a decorative cache pot. This gives you the appearance you want while leaving the roots and soil undisturbed during recovery.
Choose an outer container that allows you to lift the nursery pot out easily. Water the plant outside the decorative container or remove the nursery pot first, then let excess water drain completely. Empty any collected water before returning it to the cache pot. Standing water can leave the soil saturated and damage the roots, especially when the plant is already adjusting after delivery.
Choose a draining pot with slightly more space
When it is time to repot, choose a container with drainage holes and only slightly more space than the current pot. A container one size larger is usually enough. A much larger pot holds extra soil, which may stay wet longer than the roots can use.
Select a potting mix that suits the plant. Many houseplants do well in a quality indoor mix, while succulents and other drought-tolerant plants need faster drainage. The Plants By Mail planting guide recommends choosing a container that leaves room for root growth without creating a large area of persistently damp soil.
Use the right mix and preserve the planting depth
Remove the plant carefully, supporting the root ball and stems instead of pulling on the leaves. Add fresh mix to the new pot so the top of the root ball sits at the same depth as before. Do not bury the stem or cover the crown with soil, since excess moisture around these areas can lead to rot.
For outdoor planting, make the hole about two to three times wider than the root ball, but no deeper. Set the top of the root ball level with, or slightly above, the surrounding soil. Fill around it with soil, then water thoroughly so the roots make good contact with the ground. Follow the florist’s care card if it recommends a different mix or planting method for your specific plant.
Repot immediately for drainage or serious root problems
Waiting is best for a stable plant, but some problems require immediate repotting. Act sooner if the nursery pot is cracked, cannot drain, or has collapsed around the root ball. A rotten smell or roots that look soft, dark, and mushy can also indicate a serious issue.
Handle the plant gently and remove loose, damaged soil and roots without tearing healthy roots. Place it in a clean container with drainage holes and fresh, well-draining mix. Avoid moving it into an oversized pot or adding fertilizer right away. Keep the plant in a steady location and monitor the soil closely. If the damage appears severe, photograph the plant, container, and packaging, then contact the florist for care or replacement guidance.
Transition outdoor plants before planting them outside
Do not move a delivered outdoor plant directly into strong sun, wind, or cold temperatures. Begin in a sheltered spot with bright, filtered light. Once the leaves look firm and the plant appears stable, gradually increase its exposure to outdoor conditions over one to two weeks.
Start with short outdoor periods, then add more time each day. Protect the plant from frost, strong wind, and intense afternoon sun during this adjustment. Before planting, confirm that nighttime temperatures suit the plant and that the location provides the right light and moisture. After planting, keep the root zone evenly moist while new roots grow into the surrounding soil.
How Can I Recognize and Treat Transplant Shock?
A delivered plant may need time to adjust after changes in temperature, light, humidity, and handling. This temporary stress is often called transplant shock, even when the plant has not been moved into a new pot. Mild symptoms usually improve when the plant receives steady care and time to settle.
Place the plant in a calm location and observe it over the next several days. Check the soil before watering, keep the temperature consistent, and resist the urge to make several changes at once. If the plant shows severe damage or does not improve, contact the florist with photos and order details.
Watch for drooping, yellowing, browning, and leaf drop
Drooping leaves are among the most common signs of shipping stress. You may also notice yellow leaves, brown edges, slower growth, or a few older leaves falling away. These symptoms can appear as the plant adjusts to its new environment. Plants By Mail’s plant care guide identifies wilting, yellowing, leaf drop, slow growth, and browning older leaves as common signs of stress.
Check the soil before watering. If it feels dry below the surface, water according to the plant’s care instructions and let excess water drain. If the soil is moist, wait. Keep the plant in bright, indirect light and remove only leaves that are fully dead, mushy, or broken. Green leaves may still help the plant recover.
Check for severe wilting, mushy roots, odors, and black stems
Some symptoms indicate a problem beyond normal shipping stress. Look for widespread black or mushy tissue, a crushed crown, a snapped main stem, or roots that are soft and foul-smelling. Active pests, severe heat or freeze damage, and complete collapse also warrant prompt attention. Contact the florist before attempting several treatments at home.
If roots are visible, inspect them without pulling the plant from its container. Healthy roots are generally firm, while mushy roots may indicate rot or prolonged moisture. Take clear photos of the plant, container, damaged areas, and packaging, and keep the materials until you receive instructions. Canopy Plant Co.’s delivery guidance lists several conditions that call for contacting the seller.
Keep light, temperature, humidity, and watering consistent
Place the plant in bright, indirect light unless its care card recommends something else. Keep it away from heating vents, air conditioners, cold windows, open doors, and other sources of sudden temperature changes. A stable location gives the leaves and roots time to adjust without adding further stress.
Water according to the soil, not the leaves’ appearance alone. Wilting can result from dry soil, but it may also come from cold temperatures, excess heat, root damage, or a sudden change in light. Avoid direct sun, repotting, frequent relocation, and fertilizer while the plant recovers. Canopy Plant Co. recommends consistent conditions and patience during this period.
Prune only dead or broken growth
Wait before giving a stressed plant a major trim. Remove leaves that are completely brown, mushy, or broken, and use clean scissors to cut away snapped stems. Do not remove green leaves simply because they look bent, spotted, or less vibrant than usual. Even damaged green foliage can continue to support the plant while it recovers.
If only part of a leaf is brown, you can leave it in place or trim around the damaged edge for a neater appearance. Avoid removing healthy growth from several areas at once. A light cleanup is usually enough during the first few days. Canopy Plant Co.’s care recommendations advise keeping green but damaged leaves when possible.
Wait to fertilize until new growth appears
Fertilizer is not a quick treatment for transplant shock. A stressed plant may not be ready to use additional nutrients, and fertilizer applied while the roots are struggling can cause further damage. Wait until you see signs of recovery, such as firmer leaves, steady growth, or a new leaf or stem.
When the plant begins actively growing, choose a fertilizer suited to its variety and follow the label directions. Start with the recommended amount rather than applying extra product. Plants By Mail advises against heavy fertilizing for newly shipped or stressed plants. If the florist provides feeding instructions, follow those recommendations.
Make one care change at a time
When a plant looks unwell, it can be tempting to move it into brighter light, water it again, repot it, prune it, and add fertilizer all at once. This makes it difficult to tell which change helped and may place more stress on the plant. Address the most likely issue first, then give the plant time to respond.
For example, move a plant away from a cold window and observe it before changing its watering routine. If the soil is dry, water thoroughly and let the pot drain, but do not add another treatment immediately. Keep notes about the plant’s location, soil moisture, and visible changes. Canopy Plant Co. recommends stable conditions and patience instead of multiple adjustments at once.
How Can I Support Healthy Growth After Delivery?
Once your delivered plant has settled into its new home, focus on steady care rather than frequent changes. Packing and transportation can temporarily affect a plant’s leaves, soil, and overall appearance. It may need several days to adjust to different light, temperature, humidity, and watering conditions.
Begin with the care card provided by your florist, then observe the plant before changing its routine. Check whether the soil is drying, whether the leaves are becoming firmer, and whether the stems remain upright. These details can tell you more than a single wilted leaf.
Avoid repotting, fertilizing, pruning, or moving the plant repeatedly during its first few days unless you notice an urgent issue, such as standing water, broken stems, or severe root damage. Small, measured adjustments give the plant time to respond and make it easier to identify what it needs.
Match light to the plant’s needs
Bright, indirect light is a good starting point for many delivered houseplants. Place the plant near a bright window, but keep it out of intense direct sun while it recovers. Strong sunlight through a south- or west-facing window can heat the leaves and cause additional stress.
Keep the plant away from hot glass, heaters, and air-conditioning vents. Once the leaves look firmer and the plant appears stable, increase its light gradually. Canopy Plant Co.’s plant delivery guidance recommends making light changes in small steps over one to two weeks.
Your plant’s ideal location depends on its variety. A succulent may eventually need more direct light, while a tropical plant may prefer filtered light. Check the florist’s care card before choosing a permanent spot.
Keep temperatures stable and avoid drafts
Choose a location with a steady temperature while the plant adjusts. Keep it away from fireplaces, radiators, heating vents, air-conditioning units, drafty doors, and frequently opened windows. Sudden temperature changes can cause drooping, browning, or leaf drop, particularly in plants with thin foliage.
Cold glass can also affect a plant overnight, especially during winter. Place the container a short distance from the window rather than directly against it. Avoid putting a newly delivered plant beneath a strong grow light until it has warmed and settled.
If the soil or container feels cold, let the plant reach room temperature before watering heavily. Stable conditions help the roots recover and make it easier to notice genuine changes in the plant’s health.
Use a humidifier or safe humidity tray
Slightly higher humidity can help some plants during their first week indoors, especially tropical varieties and plants with thin leaves. A small humidifier placed nearby can provide gentle moisture, but clean it regularly and avoid directing mist straight at the leaves or soil.
A humidity tray is another option. Fill a shallow tray with pebbles and a small amount of water, then place the pot on top of the pebbles. Keep the water below the pot’s base so the container does not sit in standing water.
Do not seal the plant in a plastic bag or place it in a wet, stagnant space. Excess moisture around the foliage and soil can encourage rot. Canopy Plant Co. advises using humidity carefully, particularly while a plant is recovering from shipping.
Clean leaves and rotate the pot
Dust and packing debris can collect on leaves during delivery. If the plant’s care instructions allow it, gently wipe the foliage with a clean, slightly damp cloth. Support each leaf from underneath as you clean it, and avoid scrubbing soft or damaged areas.
Cleaning the leaves also gives you an opportunity to check for pests, webbing, unusual spots, or discoloration. Do not use leaf-shine products unless the florist specifically recommends one, since some products can interfere with the leaf’s natural surface.
Rotate the pot a quarter turn every few days so the plant receives light more evenly. This can help prevent leaning as it adjusts to its new location. Avoid removing leaves simply because they look bent or bruised. Green leaves can still support recovery. Remove only foliage that is clearly broken, mushy, or fully dead.
Fertilize lightly after recovery and during active growth
A recently delivered plant usually does not need fertilizer immediately. Transportation, changes in light, and a new indoor environment can temporarily stress the roots. Adding fertilizer too soon may irritate those roots, particularly if the plant is already wilted or the soil is unusually dry or wet.
Wait until the plant looks stable and begins producing new growth before feeding it. When you do fertilize, follow the product label and use only the recommended amount. A starter or slow-release fertilizer may suit some plants, but it is not appropriate for every variety.
Plants by Mail recommends waiting to fertilize stressed plants and following the product directions. Feed during the plant’s active growing period, then reduce or stop fertilizing when its care instructions call for dormancy.
Follow the florist’s care card and plant instructions
Your florist’s care card should be your first reference for light, watering, humidity, temperature, and feeding. A flowering plant, tropical houseplant, succulent, or outdoor perennial can have very different needs, even when each arrives in a decorative container.
Keep the card near the plant so you can refer to it when conditions change. Note details that are easy to forget, such as whether the soil should dry between waterings or whether the plant should stay out of direct sun.
A helpful routine is to inspect the plant, provide a suitable temporary location, check soil moisture, and monitor it closely during the first month. Plants by Mail’s arrival care recommendations also emphasize careful inspection, correct planting depth, proper watering, and close observation after delivery. If the plant changes quickly, contact the florist before making several care changes at once.
How Do I Monitor My Delivered Plant as It Establishes?
A delivered plant may need several weeks to settle into its new home. Shipping, temperature changes, handling, and a new level of light can affect its appearance, even when the plant is healthy. The most helpful approach is to watch for gradual changes and make small adjustments rather than changing several care conditions at once.
Use a simple first-day, first-week, and first-month routine. Keep notes about watering, light, humidity, and any symptoms you notice. If your plant arrived from a local florist serving Salt Lake City, Portland, or Seattle-Tacoma, follow the care card included with your delivery, along with the plant’s specific needs.
Follow a first-day, first-week, and first-month routine
On the first day, inspect the leaves, stems, soil, and container. Place the plant in a stable spot with bright, indirect light, then let it rest. Avoid repotting, fertilizing, or moving it repeatedly unless you find an urgent problem, such as severe root damage, poor drainage, or a broken container.
During the first week, check the plant daily. Feel the soil before watering and watch for changes in leaf position, color, or stem firmness. Continue these checks throughout the first month, making adjustments only when the plant’s condition calls for them. This new plant care guide offers a similar first-day, first-week, and first-month routine.
Track watering, light, humidity, and changes
A few simple notes can make plant care easier. Record when you water, whether the soil feels dry or moist, where the plant sits, and any changes you notice. A note in your phone is enough. You are looking for patterns, not creating a detailed care journal.
Pay attention to how the plant responds to its location. Leaves may droop near a heat vent, while soil may remain wet longer in a dim room. Watering needs depend on the plant, pot, soil, light, temperature, and season. Check the soil instead of following a fixed calendar. Plant care guidance recommends checking moisture often during the first week.
Check leaf undersides and soil for pests
Pests can hide beneath leaves, around stem joints, or near fresh growth. Once or twice a week, gently turn over several leaves and look for webbing, tiny insects, sticky residue, pale speckling, or clusters. A soft cloth can remove dust from broad leaves and make these signs easier to see.
Inspect the soil line and the outside of the pot, too. Damp soil may attract fungus gnats, while mold, an unpleasant odor, or soil that stays wet for too long can point to a moisture issue. If you find pests, place the new plant away from other houseplants while you identify the problem. This short separation gives you time to inspect and treat it without exposing the rest of your collection. You can also review new-plant inspection advice for additional signs.
Look for firm stems, stable leaves, and new growth
Healthy establishment usually happens gradually. Look for stems that remain firm, leaves that stop drooping, and foliage that holds its normal color and shape. New leaves, buds, or shoots are encouraging signs that the plant is adapting to its surroundings.
Some wilting, yellowing, browning, or leaf drop can occur after shipping. These symptoms do not always mean the plant is failing. Pay attention to whether they are slowing down or spreading. Severe symptoms, such as mushy roots, blackened stems, or a sour smell, need closer attention. Transplant shock guidance explains that a plant may settle within a few weeks, while full establishment can take several months.
Adjust care as conditions and seasons change
A plant’s needs can change when the room becomes warmer, the days grow shorter, or indoor humidity shifts. Check the soil more often during hot, dry periods, but do not water if it is still moist. In cooler or darker conditions, the plant may use water more slowly.
Watch what happens after each adjustment. If the soil stays wet for several days, consider a brighter location if the plant allows it, better airflow, or less frequent watering. If leaves become crisp and the soil dries quickly, check for direct afternoon sun, heating vents, or dry air. Change one condition at a time so you can tell what helps. Watering guidance recommends responding to soil moisture and weather instead of following a strict schedule.
Trust steady improvement and avoid unnecessary changes
It can be tempting to repot, fertilize, move, and prune a stressed plant all at once. A calm routine usually works better. Keep the plant in suitable light, maintain consistent moisture, and remove only leaves or stems that are clearly dead or broken. Give it time to respond before making another change.
Measure progress over days and weeks, not hours. A few older leaves may yellow while new growth develops, and mild drooping may improve as the plant adjusts to its new surroundings. If the plant continues to decline despite consistent care, take clear photos and contact the florist. Include details about its light, temperature, and watering routine so the florist can tell whether the symptoms reflect shipping stress or call for a different care plan.
When Should I Contact the Florist About Plant Damage?
A delivered plant may look slightly tired after its journey. Drooping leaves, dry soil, or a few bent leaves often improve after the plant rests in a stable indoor location. More serious signs, however, call for prompt attention from the florist.
If you are unsure whether the plant can recover, contact the florist before making several care changes. A florist can help you tell the difference between ordinary shipping stress and damage that may qualify for a replacement, store credit, or another solution. Since reporting windows vary, check the florist’s delivery policy as soon as you notice a problem.
Report serious damage promptly
Contact the florist as soon as possible if the plant arrives with a crushed crown, snapped main stem, widespread black or mushy tissue, active pests, or severe heat or freeze damage. You should also reach out if the entire plant collapses and does not improve after proper watering and time indoors.
Some shipping stress is expected, but serious damage can worsen quickly. Avoid extensive pruning, repotting, or pest treatments until you have documented the problem and spoken with the florist. The guidance on what to do when a plant arrives damaged can help you protect the plant while waiting for a response.
Share order details, delivery information, and photos
When you contact the florist, include the order number, recipient’s name, delivery address, and delivery date. Explain what you noticed and when you first saw the damage. These details help the florist find the order and determine whether the issue may have happened during handling, transportation, or delivery.
Send photographs of the entire plant, close-ups of damaged areas, the shipping box, and the packing materials. Include clear images of broken stems, discolored leaves, exposed roots, crushed foliage, or disturbed soil. Take the photos in good light, and avoid rearranging the plant more than necessary before documenting its condition.
Keep the plant, container, and packaging
Do not throw away the plant, pot, saucer, box, or packing materials until the florist tells you what to do. The packaging may show whether the box was crushed, tipped over, exposed to moisture, or affected by extreme temperatures during delivery.
Keep everything together in a safe location, and record the delivery date for your records. The florist may request additional photos or need the materials for a delivery claim. Keeping the original container also helps the florist assess whether the roots, soil, or drainage were disturbed during transit.
Describe the plant’s light, temperature, and watering
Tell the florist where you placed the plant and what care it received after delivery. Mention whether it is near a sunny window, heater, air conditioner, draft, or cold glass. Also describe the room temperature and the amount of light the plant receives.
Explain when you last watered the plant and how much water you used. Until you receive specific instructions, place it in bright, indirect light and avoid watering if the soil feels moist. Check the soil before adding water, since overwatering a stressed plant can create additional root problems.
Follow the florist’s care, replacement, or delivery guidance
After reviewing your order details and photographs, the florist may recommend a recovery plan, replacement, store credit, or another delivery solution. Follow those instructions carefully, especially if you are asked to wait before pruning, repotting, or returning the plant.
Pay attention to any deadline for reporting damage. Some plant guarantees require customers to make contact within a specific number of days after delivery, along with photos of the plant and packaging. Keep your order confirmation and messages until the issue is resolved, and ask questions if any part of the care or replacement process is unclear.
Frequently Asked Questions
What should I do first when my delivered plant arrives? Bring the package indoors and place it in a steady location away from direct sun, drafts, heaters, and air-conditioning vents. Photograph the box and plant, then unpack it carefully by lifting the container rather than the leaves or stems.
Should I water a plant immediately after delivery? Not necessarily. Check the soil about 1 to 2 inches below the surface first. If it feels dry, water slowly with room-temperature water and let the excess drain fully. If the soil is still moist, wait and check again later.
How long should I wait before repotting my delivered plant? A healthy plant should usually remain in its original container for about 30 days while it adjusts. Repot sooner only if the pot is broken, drainage is blocked, or the roots show serious damage. A decorative outer pot can improve the appearance without disturbing the root system.
How can I tell normal shipping stress from a serious problem? Slight drooping, settled soil, bent leaves, and a few yellow leaves can occur after transport. Mushy roots, black stems, a foul odor, widespread collapse, severe pest activity, or damage that continues to spread deserve prompt attention.
When should I contact the florist about my plant? Reach out as soon as you notice major damage, such as broken main stems, crushed growth, severe temperature injury, or serious root problems. Include your order details, delivery information, photos of the plant and packaging, and a short description of the care it received. Keep the box and packing materials until the florist provides next steps.

